The primary function of api-map is to assist in defining mappings between different messages. Mappings of this kind often need to be created in software systems, and api-map attempts to make this faster, more accurate, and easier to share with others and collaborate on.
Creating a new Mapping
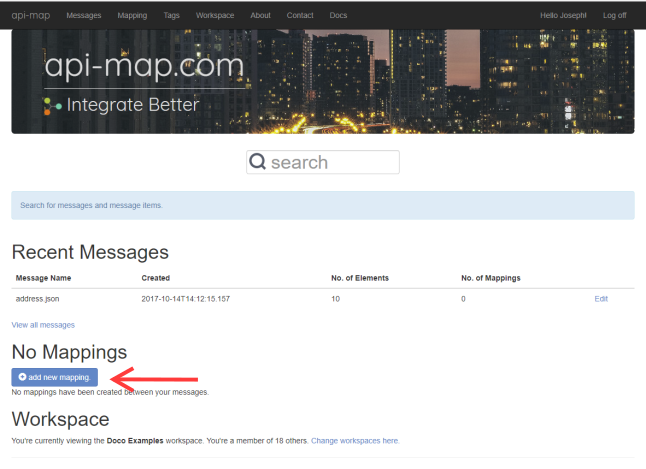
Once you've uploaded two or more messages you can now create a mapping between them by clicking 'add new mapping' from the home screen.
Choosing Which Messages to Map
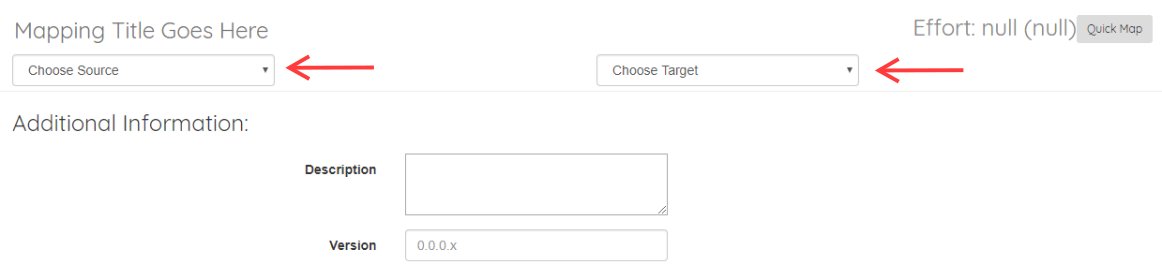
Once you've elected to create a new mapping your are then presented with two drop-down lists to choose the source message (on the left) and the target message (on the right). These are the only things that can't be changed about a mapping, since doing so effectively creates a completely new mapping.
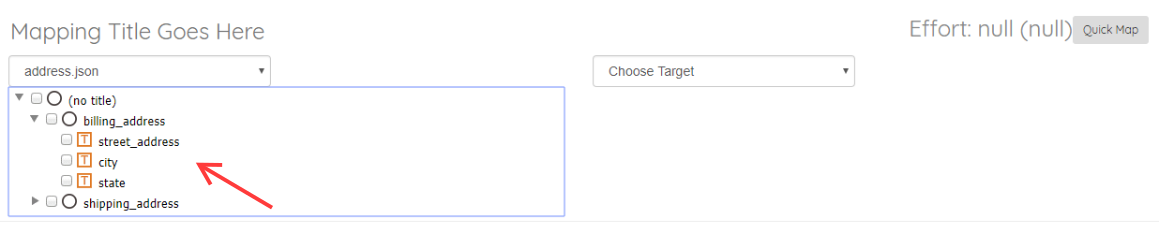
When you choose a message the "tree-view" showing the hierarchy for that message populates. You can use this to make sure you've chosen the message you intended to.
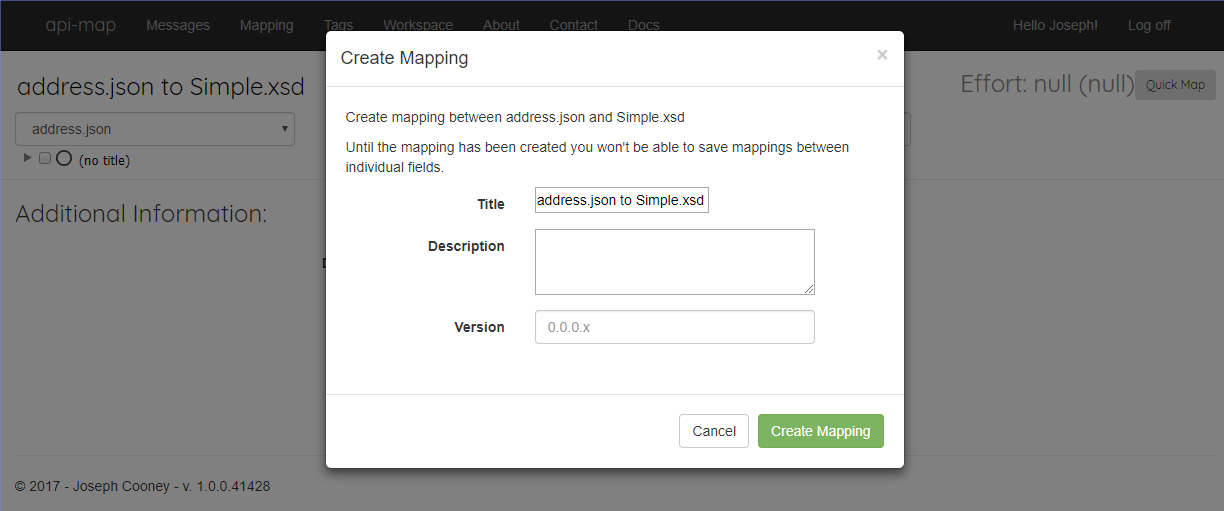
Once you've chosen both a source and target message a dialog pops up to prompt you to enter a title, additional description, and version for your mapping. The title will default to the names of the "from" and "to" messages. Click 'Create Mapping' to create the new mapping.
Once you've created the mapping the drop-down lists that you used to choose the messages disappear, and instead you'll see two hyperlinks to the message details if you need to navigate there to add additional information to the messages.

You can also change the mapping name by clicking on the title, and typing a new name.
Mapping Message Fields
The aim of message mapping is to create a valid and correctly-populated "target" message. For this reason the workflow for message mapping is as follows:
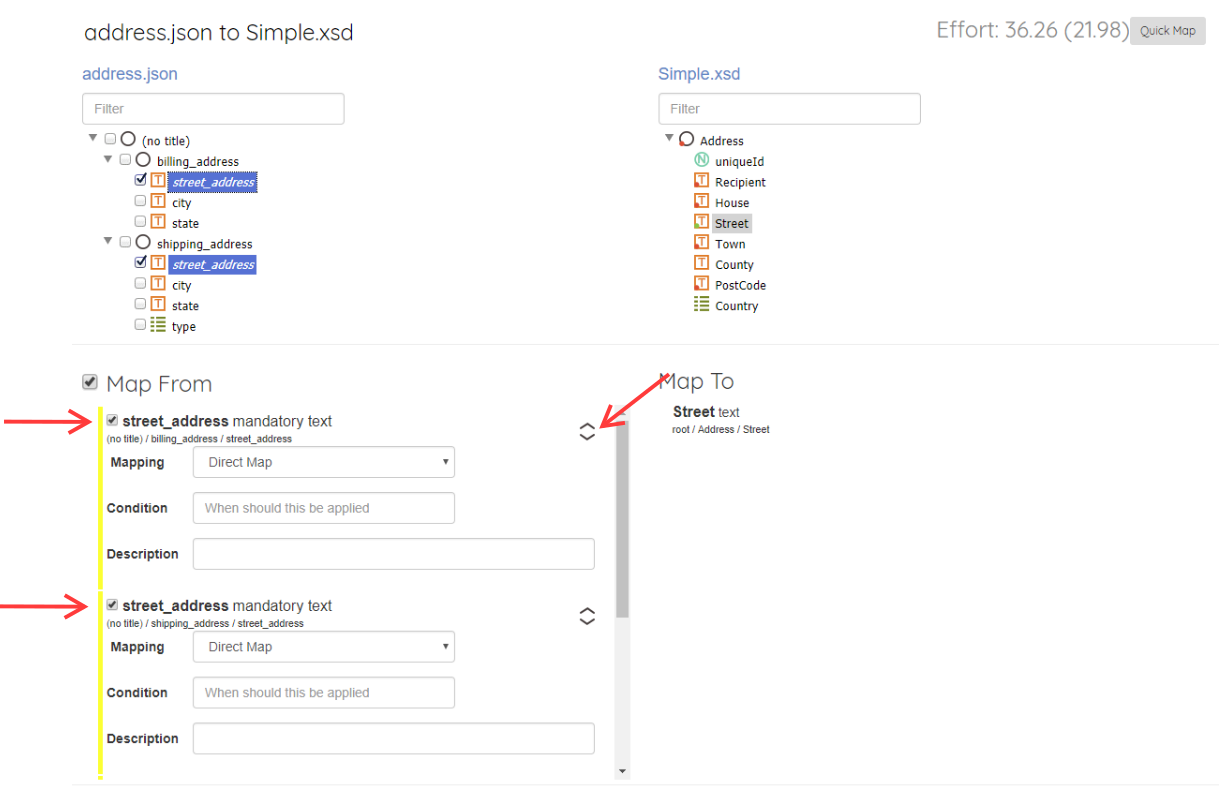
- Choose a field in the target message by clicking on it.
- View the list of suggested fields api-map has offered to map from the source, and choose the ones that apply by checking the boxes. or
- Choose an field from the source message that was not suggested by api-map by checking the check-box beside it in the tree view.
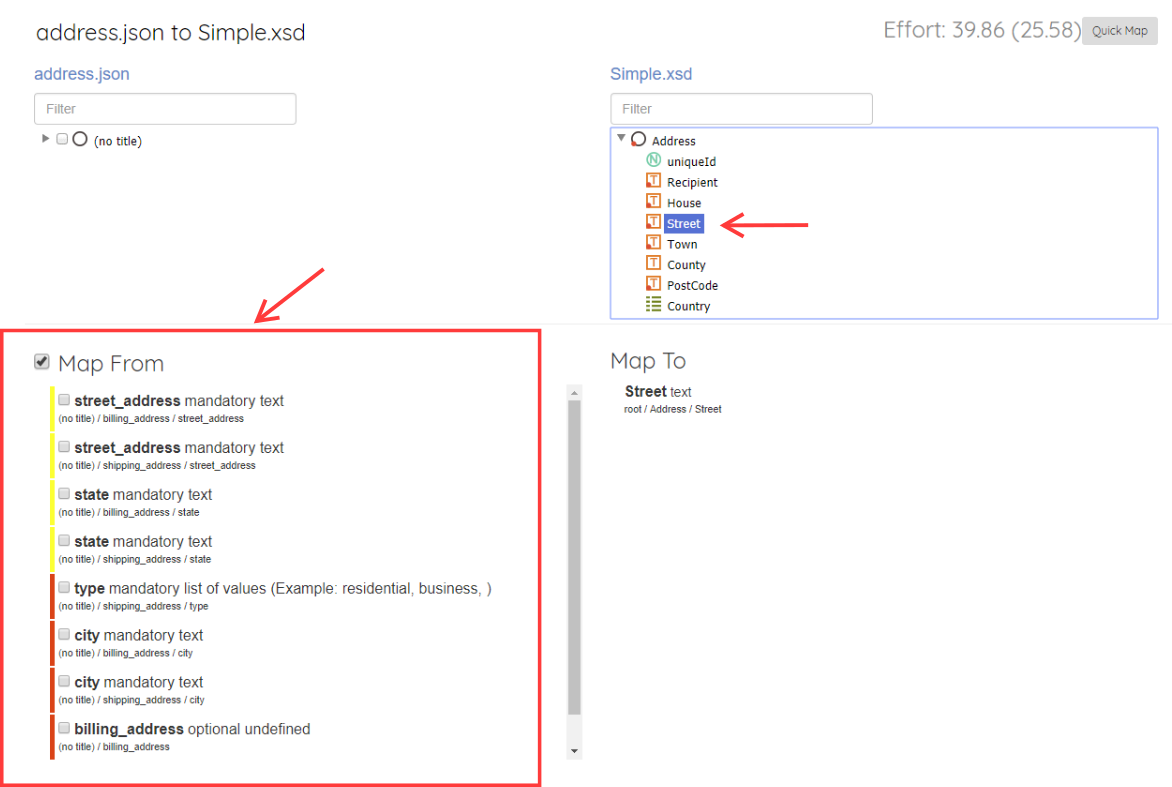
In the screen-shot below the street field in the target message has been selected and api-map has suggested a number of fields where this data should be mapped from.
Providing More Information About the Field Mapping
Once you have elected to map a field in the target message from a particular source field there are some additional pieces of information you may want to provide.
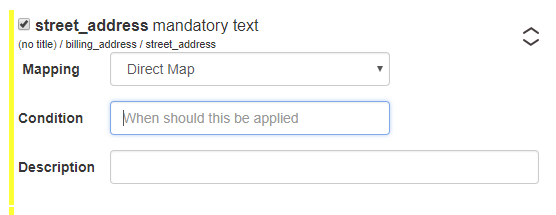
Mapping
The drop-down list labelled 'Mapping' has the values 'Direct Map' and 'Transform'. This information can be used by developers to understand whether the value from the source can be directly copied to the target (Direct Map) or whether it needs to be transformed. This information could be used by code generation tools driven off api-map in the future.
Condition
Condition specifies when the mapping should be applied.
Description
Description allows you to provide additional information about what, how, or when this mapping to the target field should occur.
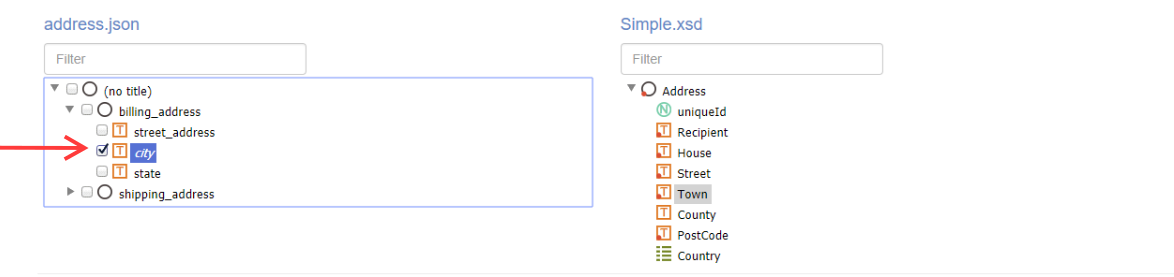
Choosing Fields Not Suggested by api-map.
Api-map attempts to suggest which fields from the source message it thinks a particular field in the target message should be populated from. Sometimes it doesn't suggest the correct fields, and in this case you will need to manually choose them yourself by finding it in the source message tree-view, and checking the check-box besied the field name. You can select multiple fields in this way. Once they have been selected they will appear in the list of mappings at the bottom of the screen, and the normal additional information you can provide with a field mapping (such as 'Direct Map' vs. 'Transform', mapping condition etc.) can be specified.
Mapping a Field from Multiple Sources
Sometimes multiple fields from the source message need to be combined into a single value in the target message, or used to drive some logic that describes how a target field should be populated. You can choose multiple fields in the source message by checking more than one check-box in the list of suggested fields. You can control the order of the mapped fields by clicking on the 'up' and 'down' arrows.
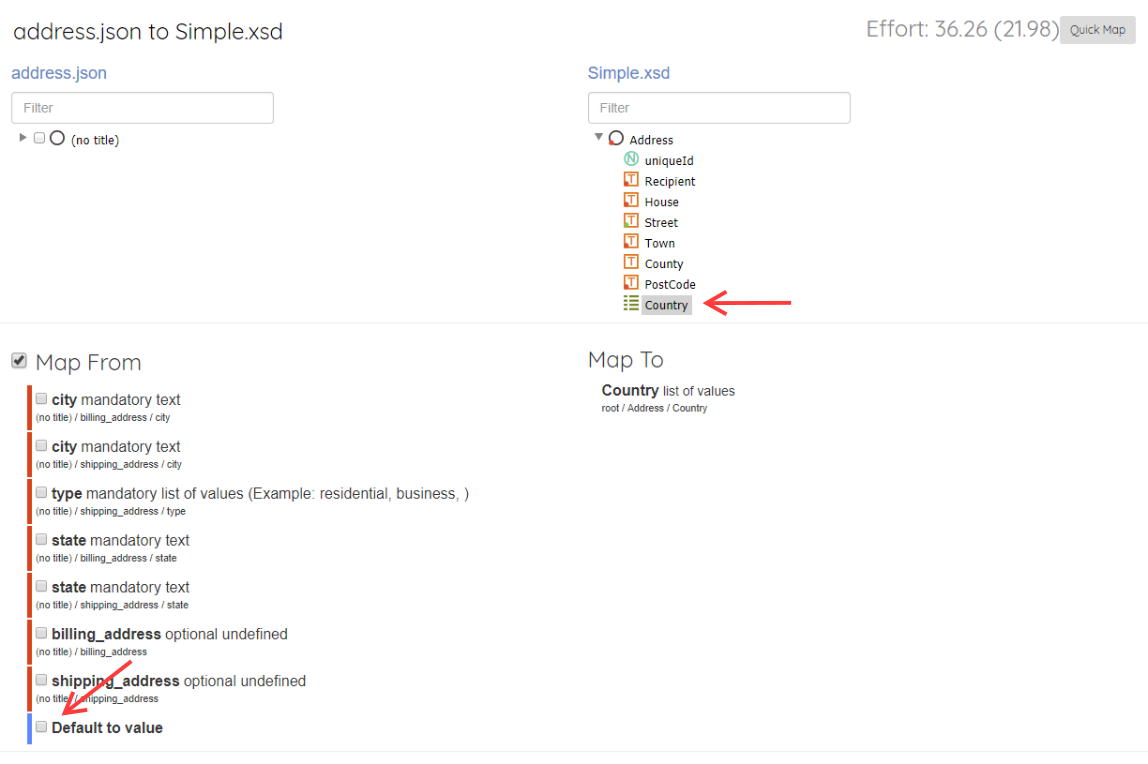
Defaulting a Field to a Particular Value
At the bottom of the list of suggested fields is an option to instead choose a default value. By checking the check-box beside this option you can enter additional information about what the default value should be.
What if a Field Should not be Mapped?
Sometimes a field should not be mapped. To distinguish between fields that haven't been considered for mapping yet, vs ones that have and an active determination has been made not to map them, there is a check-box at the top of the list of suggested fields. By un-checking this box you record the specific intent that this field should not be mapped at all.
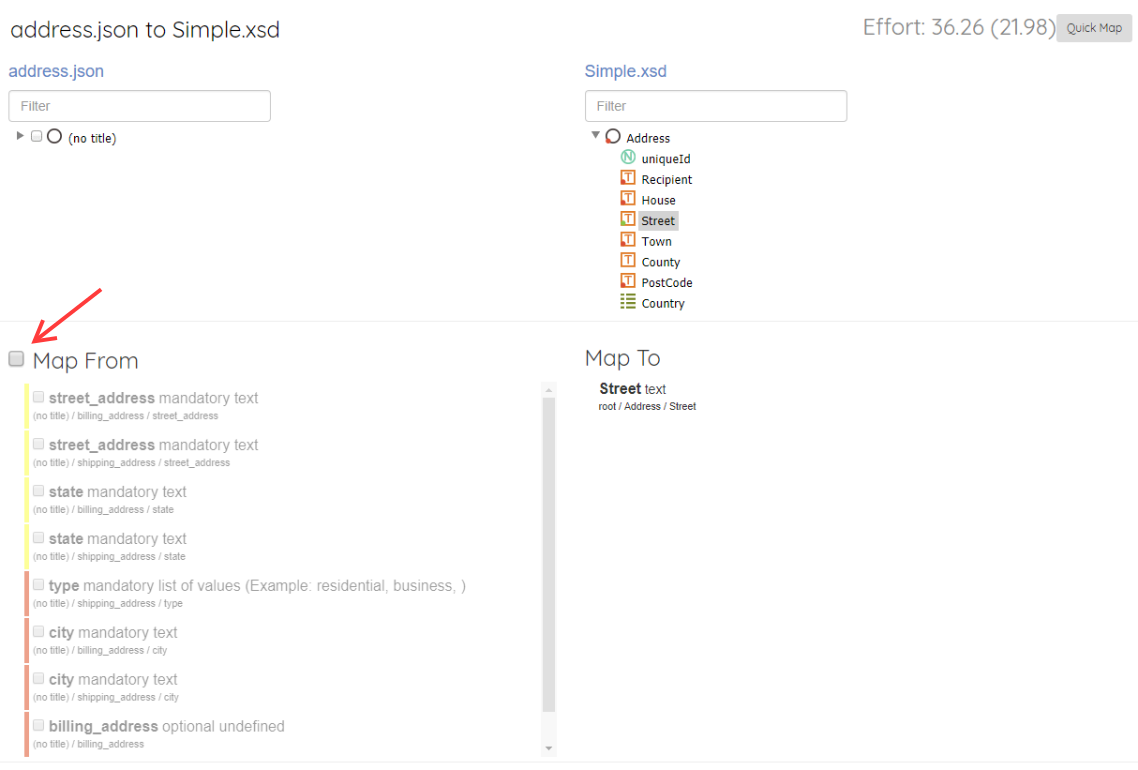
Target Message Tree-View Indicators
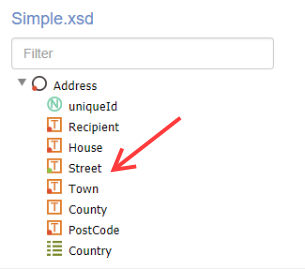
The target message tree-view shows small colored indicators beside the fields in the message. A red indicator shows that the field still needs to be mapped. A green indicator shows that the feel has already been mapped (or explicitly set to 'no mapping required'). The absence of an indicator shows that the field is not mandator and does not need to be mapped. In the screen-shot below 'Street' has been mapped, Town has not and is mandatory, and Country has not been mapped, and is not mandatory.